Create a new transaction process with the Sharetribe CLI
In this guide, we’ll create a new transaction process for your marketplace. We will use the negotiated booking process, where the customer and provider first negotiate on the price of the booking before the customer makes the payment.
Sharetribe CLI (Command-line interface) is a tool for changing your marketplace’s configurations such as transaction processes and email templates.
This guide expects that you have already installed Sharetribe CLI and are logged in with your API key. It’s recommended to first read the tutorial Getting started with Sharetribe CLI. If you haven’t read how transaction processes work in Sharetribe, it’s a good idea to do that before starting this guide.
If you want to edit an existing transaction process instead, you can follow these instructions to edit your transaction process:
Clone Sharetribe example processes repository
When you are creating a new transaction process, you can either write your process from scratch, or you can use existing processes as your starting point. Since we are using one of Sharetribe’s example processes in this guide, we will start by cloning the Sharetribe example processes repository:
git clone https://github.com/sharetribe/example-processes.gitCreate a new process
To get up and running with Sharetribe CLI, see the Getting started with Sharetribe CLI guide in Dev Docs.
Let’s see what the subcommand help tells us about process create:
$ flex-cli help process create
create a new transaction process

USAGE
  $ flex-cli process create

OPTIONS
  --path=LOCAL_PROCESS_DIR          path to the directory where the process.edn file is
  --process=PROCESS_NAME            name for the new process that is created
  -m, --marketplace=MARKETPLACE_ID  marketplace identifier
To create a new process, we need to specify a path to the local directory. That directory should contain two things:
- the process definition (process.edn file) and
- a
templatessubdirectory containing correct email templates for the email notifications defined in that process.
We already have those since we cloned the example-processes
repository. If you are creating your own transaction process, make sure
that you are including both the process.edn file and the templates
directory in your process directory.
In addition, we need to define a name for the process and the target marketplace environment. You can use the same process name, for example “negotiated-booking”, or you can name it something different, such as “booking-with-negotiation”. For clarity, in this example we’ll use a different name for the new process.
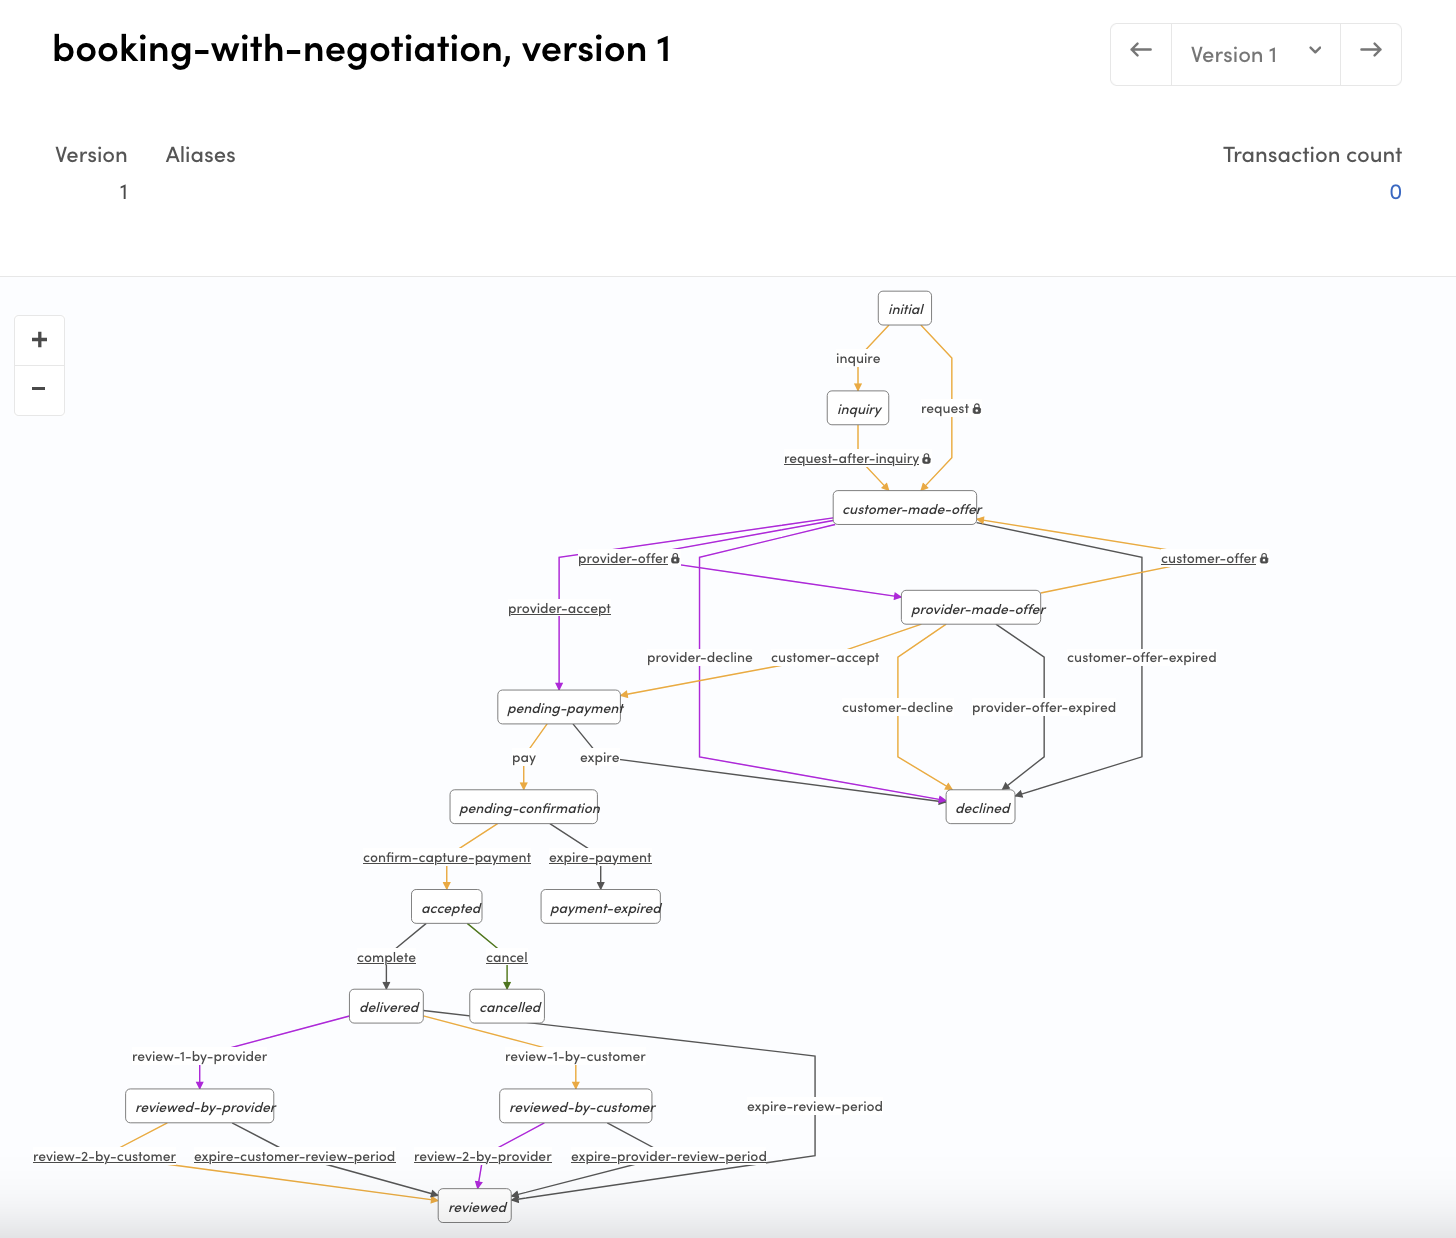
flex-cli process create --path=./negotiated-booking --process=booking-with-negotiation -m=my-marketplace-devAfter executing that command, you can go to the Sharetribe Console: Build > Advanced > Transaction process visualizer and see that the “booking-with-negotiation” process is there.
Create a process alias
The process is created, but we still can’t reference that process from our client app, since it doesn’t have process alias set. We can create an alias for our new process with Sharetribe CLI command:
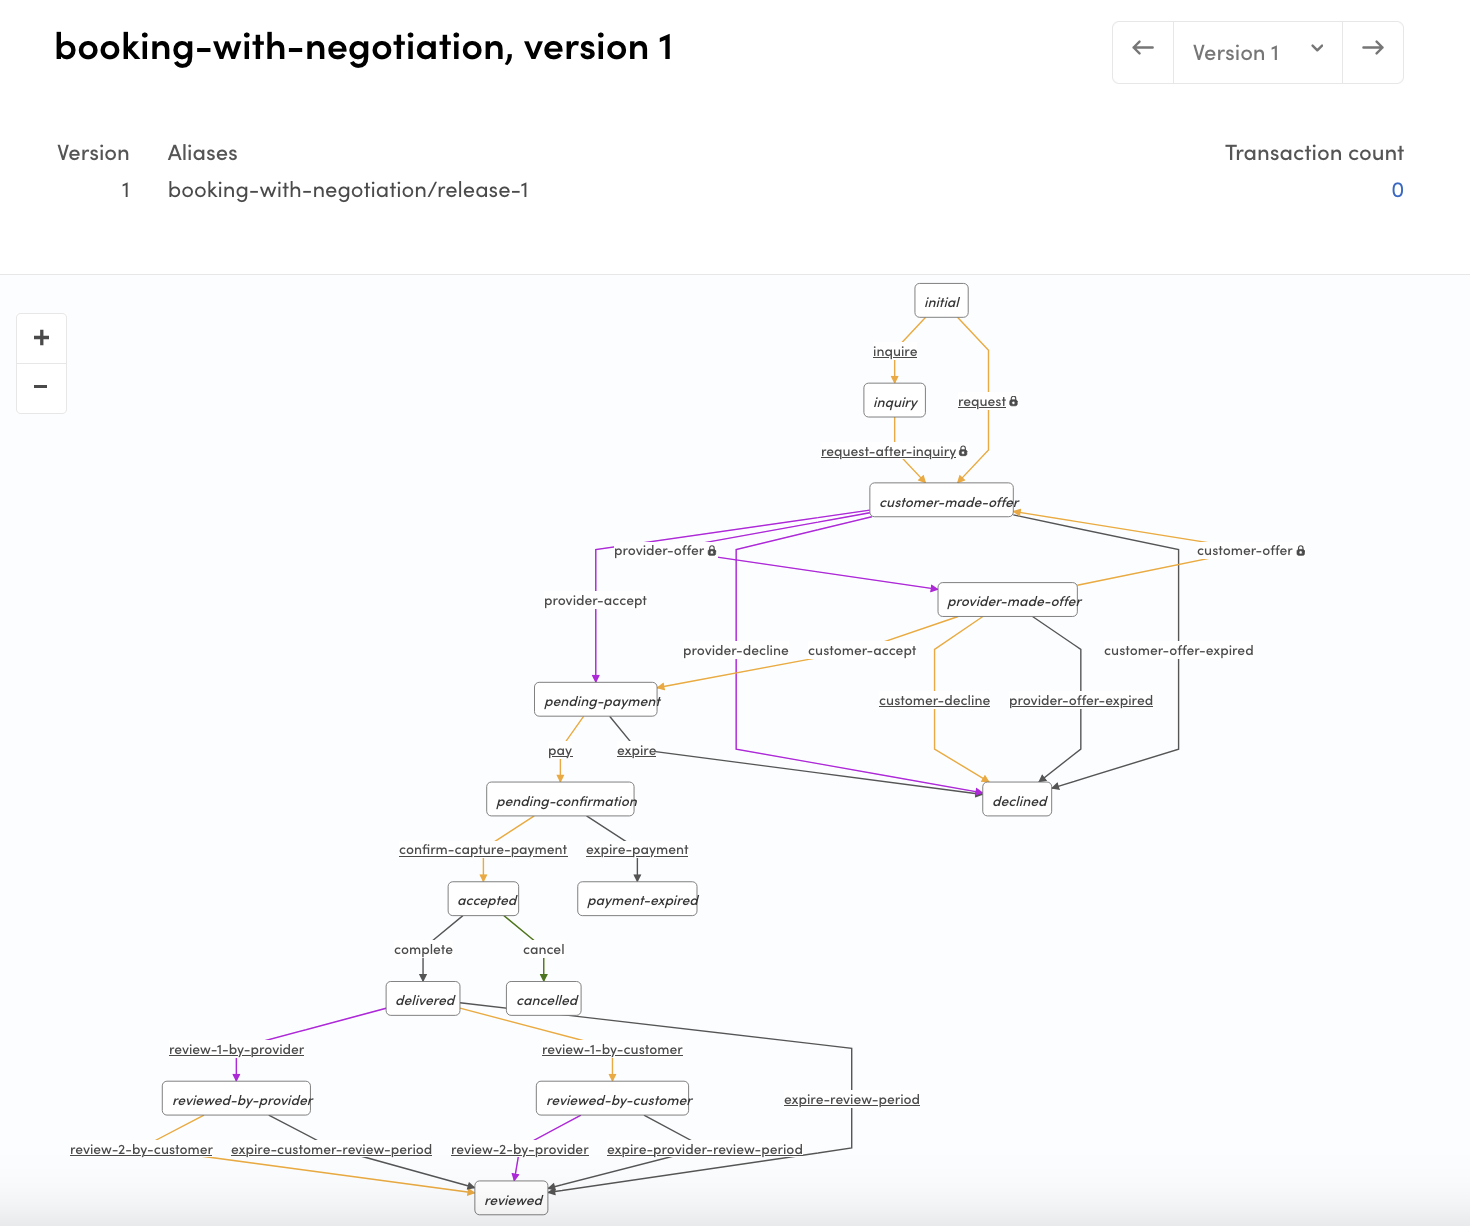
flex-cli process create-alias --process=booking-with-negotiation --version=1 --alias=release-1 -m=my-marketplace-devWith that command, we are creating a new alias “release-1” and point it to the previously created process and its version 1.
After that you should see the alias in the Console:
booking-with-negotiation/release-1.
Now, you can initiate transactions with this process using the API or SDK!
Summary
In this guide, you added a new transaction process in your Sharetribe marketplace environment, and set an alias to the process so you can reference it with the API.
If you are using the Sharetribe Web Template, you also need to modify your client app to use this process. You can follow the steps in this guide to do that: