Last updated
Create a staging environment
Deploy your marketplace to a cloud hosting platform to share it with other people.
Table of Contents
- What is a staging environment?
- Prepare to publish your marketplace
- Test server-side rendering locally
- Enable HTTP basic access authentication
- Deploy to Render
- Create an account on Render
- Create a new app
- Connect Render with a GitHub repository
- Configure settings and environment variables
- Create web service
- Domains and certificates
- What next?
Now that you have customised your marketplace's styling, it is time to deploy the web application to a public web server. After all, you want your marketplace to be accessed by your colleagues and friends over the Internet. This tutorial will provide an overview of how to deploy a staging environment to a public server, such as Render or Heroku.
What is a staging environment?
So far, you have been developing your marketplace in a development environment on your local machine. At some point during the development process, you will want to start testing features in an environment where a server exposes your website to the public Internet. Using a cloud hosting service like Render or Heroku, you can deploy your application to a server, after which your marketplace will be accessible through a public URL.
Prepare to publish your marketplace
Before deploying your staging environment, you want to make sure Server-Side Rendering (SSR) works. In addition, password-protecting your staging environment is a good idea to prevent it from being accessed by unauthorized users.
Test server-side rendering locally
Before you deploy your marketplace to Render or another hosting service, you should first ensure that your client application runs without error when using SSR.
The Sharetribe Web Template has a small Node/Express server that enables SSR. It allows pages to be rendered faster than on the client, but even more importantly, it makes it easier for search engines to index your website (in case they don't execute JavaScript).
To start up the server locally, you will need to run the command:
yarn run dev-serverThis command will run the actual Node/Express server in server/index.js so you can test server-side rendering, simulating how the client application would run in a production environment.
Information
If you have issues with SSR, you have likely called functions that belong to the window object/scope. In the server environment, the window object is not available.
Enable HTTP basic access authentication
You can enforce access control in your web application by enabling HTTP basic access authentication. It's a good idea to restrict access to your web application while still testing your marketplace: it prevents your site from being indexed in search engines and users from accidentally signing up in a marketplace still under development.
Sharetribe Web Template exposes two environment variables with which you can set a username and password that limit access to your web application. When you deploy your application to Render, remember to define the following environment variables:
BASIC_AUTH_USERNAME and BASIC_AUTH_PASSWORD
This will prevent anybody without the correct password and username from accessing your staging marketplace.
Deploy to Render
This section provides a step-by-step guide on how to deploy your marketplace to Render. You can also deploy your marketplace on another cloud hosting platform, but we suggest using Render as it provides a free tier and is quick and easy to set up.
Information
Make sure you have completed the Tutorial introduction, as this step requires having your code hosted in a Git repository.
Create an account on Render
Go to Render and create a new account if you do not have one already.
Create a new app
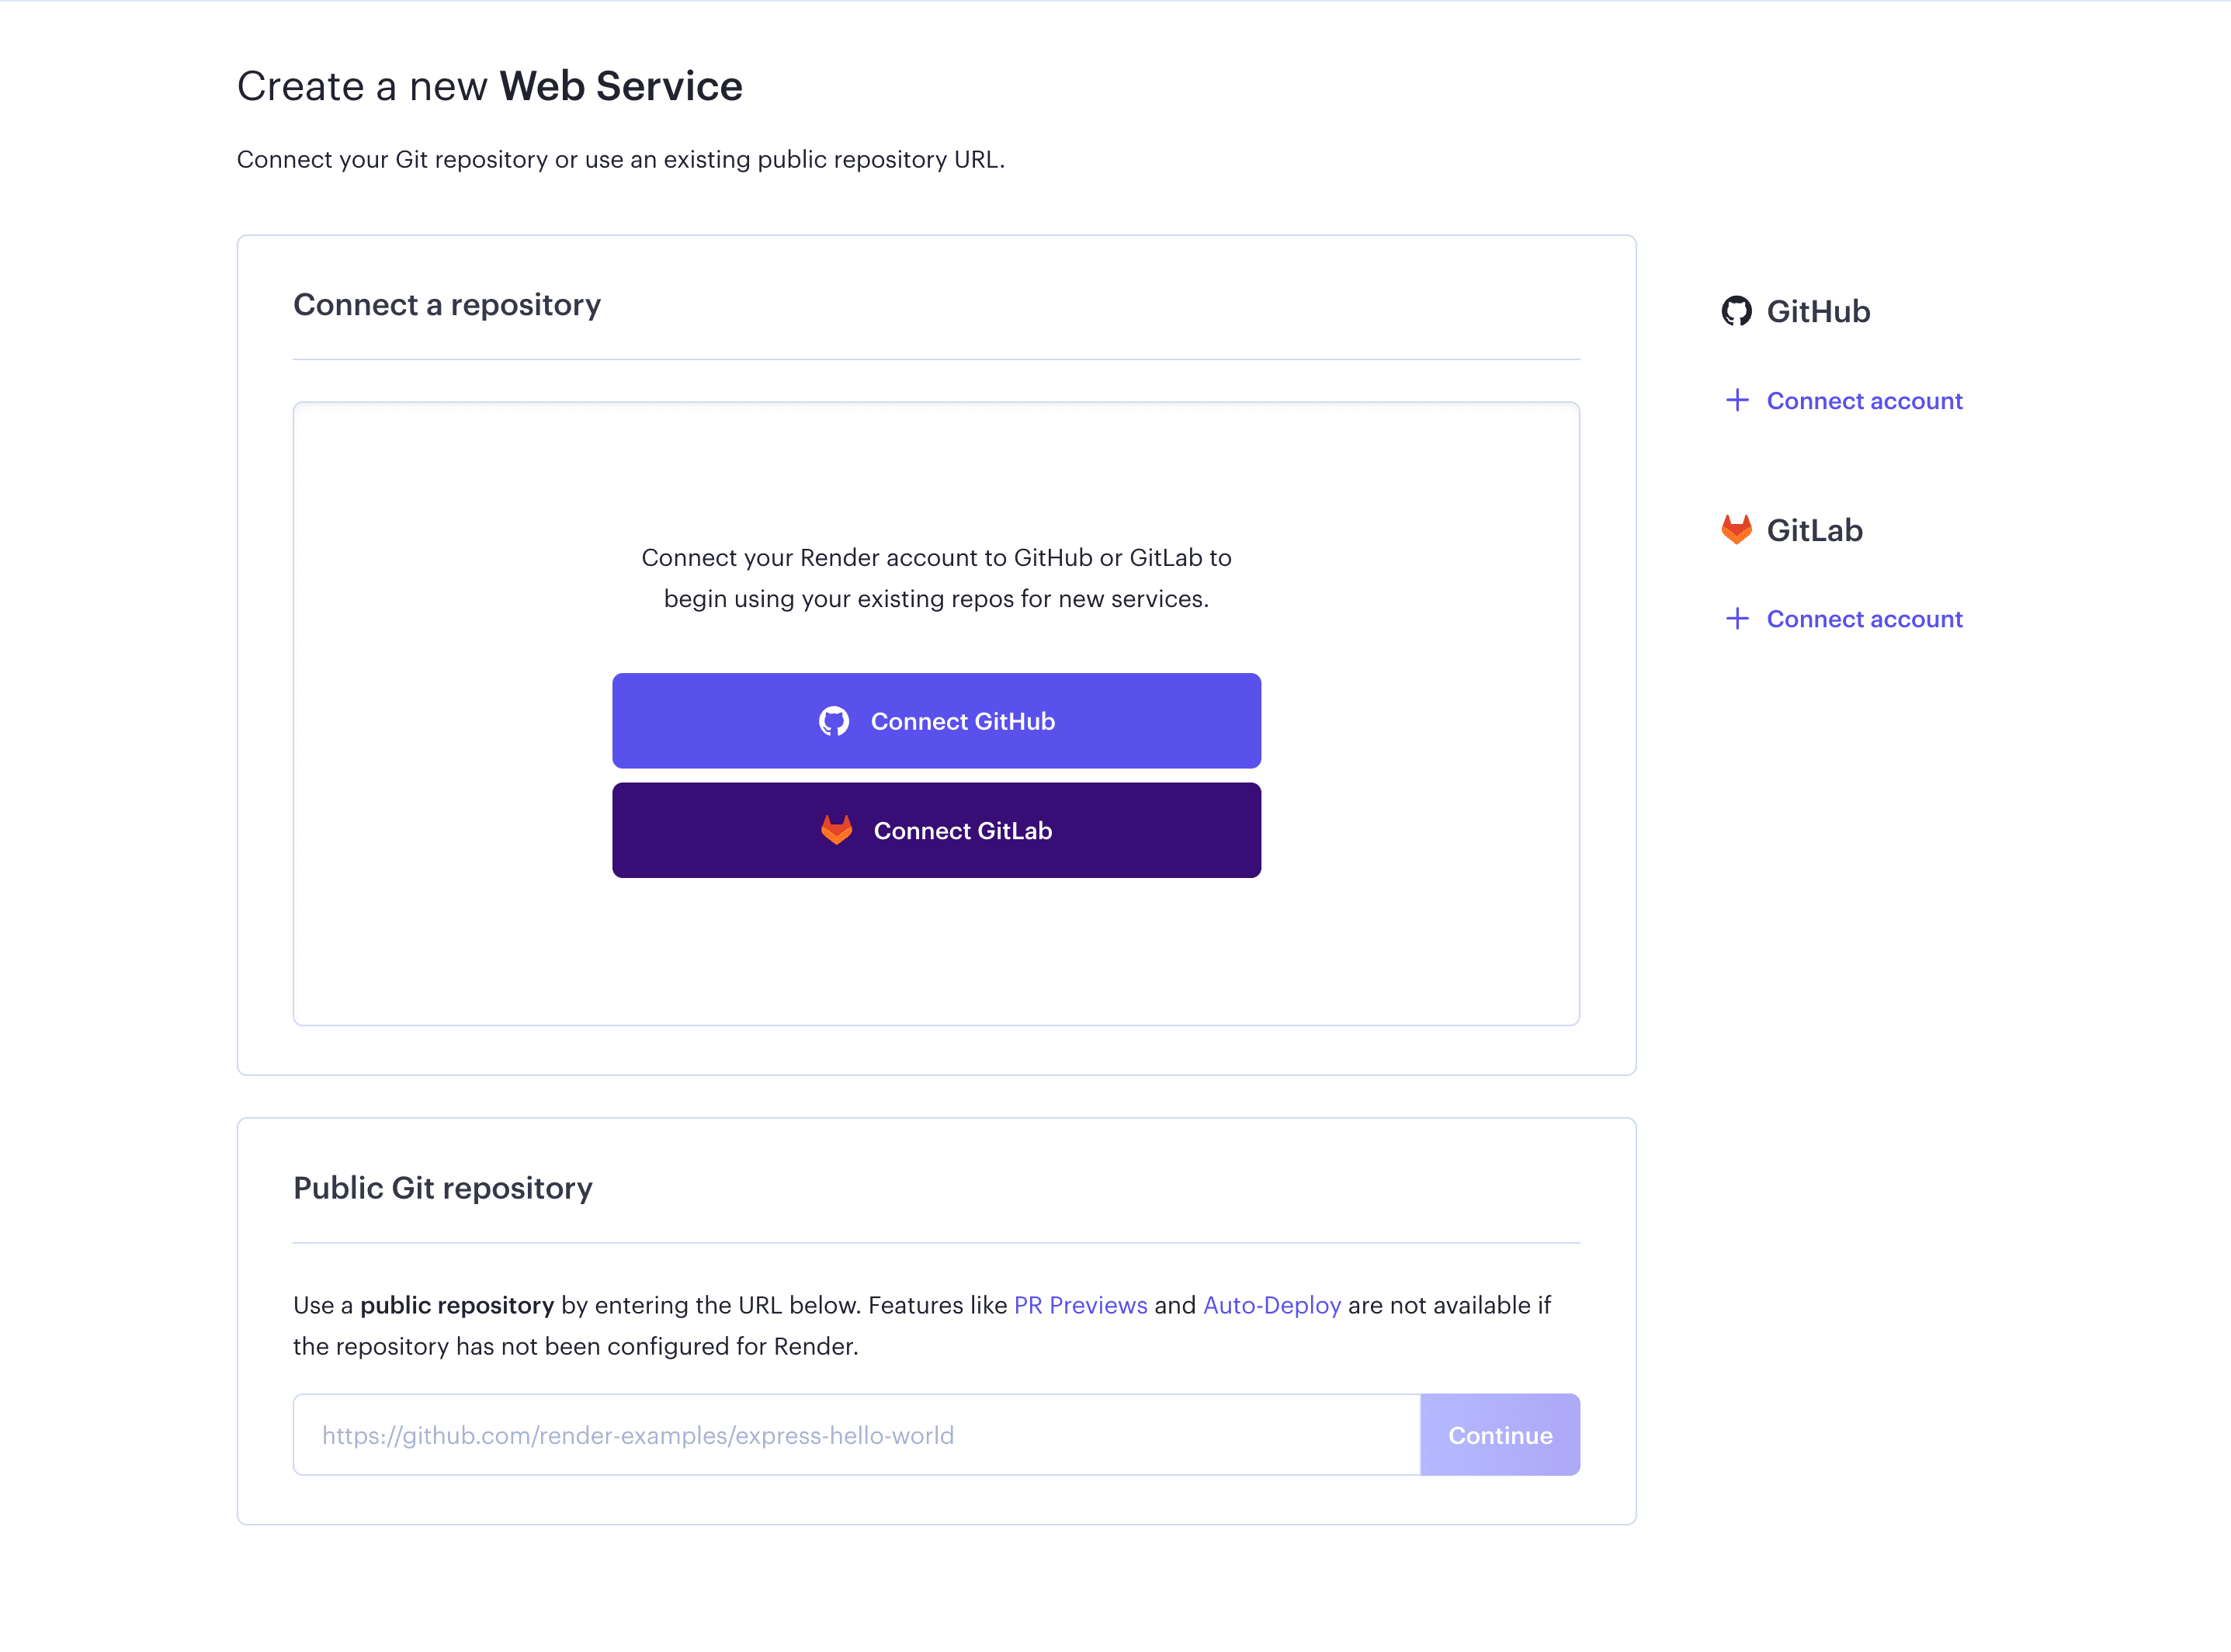
Go to the Render dashboard and create a new application. Select "web service":

Connect Render with a GitHub repository
Log in using your GitHub account and give Render permission to access the repository you want to deploy.
Configure settings and environment variables
Give your web service a name. You do not need to touch any other settings (such as environment, branch, build command and start command), and select the free plan. Before clicking on "create web service", click on "Advanced" to enter the required environment variables.
You can choose to enter the environment variables one-by-one through the browser interface:

Or by creating a secret file that contains all environment variables:
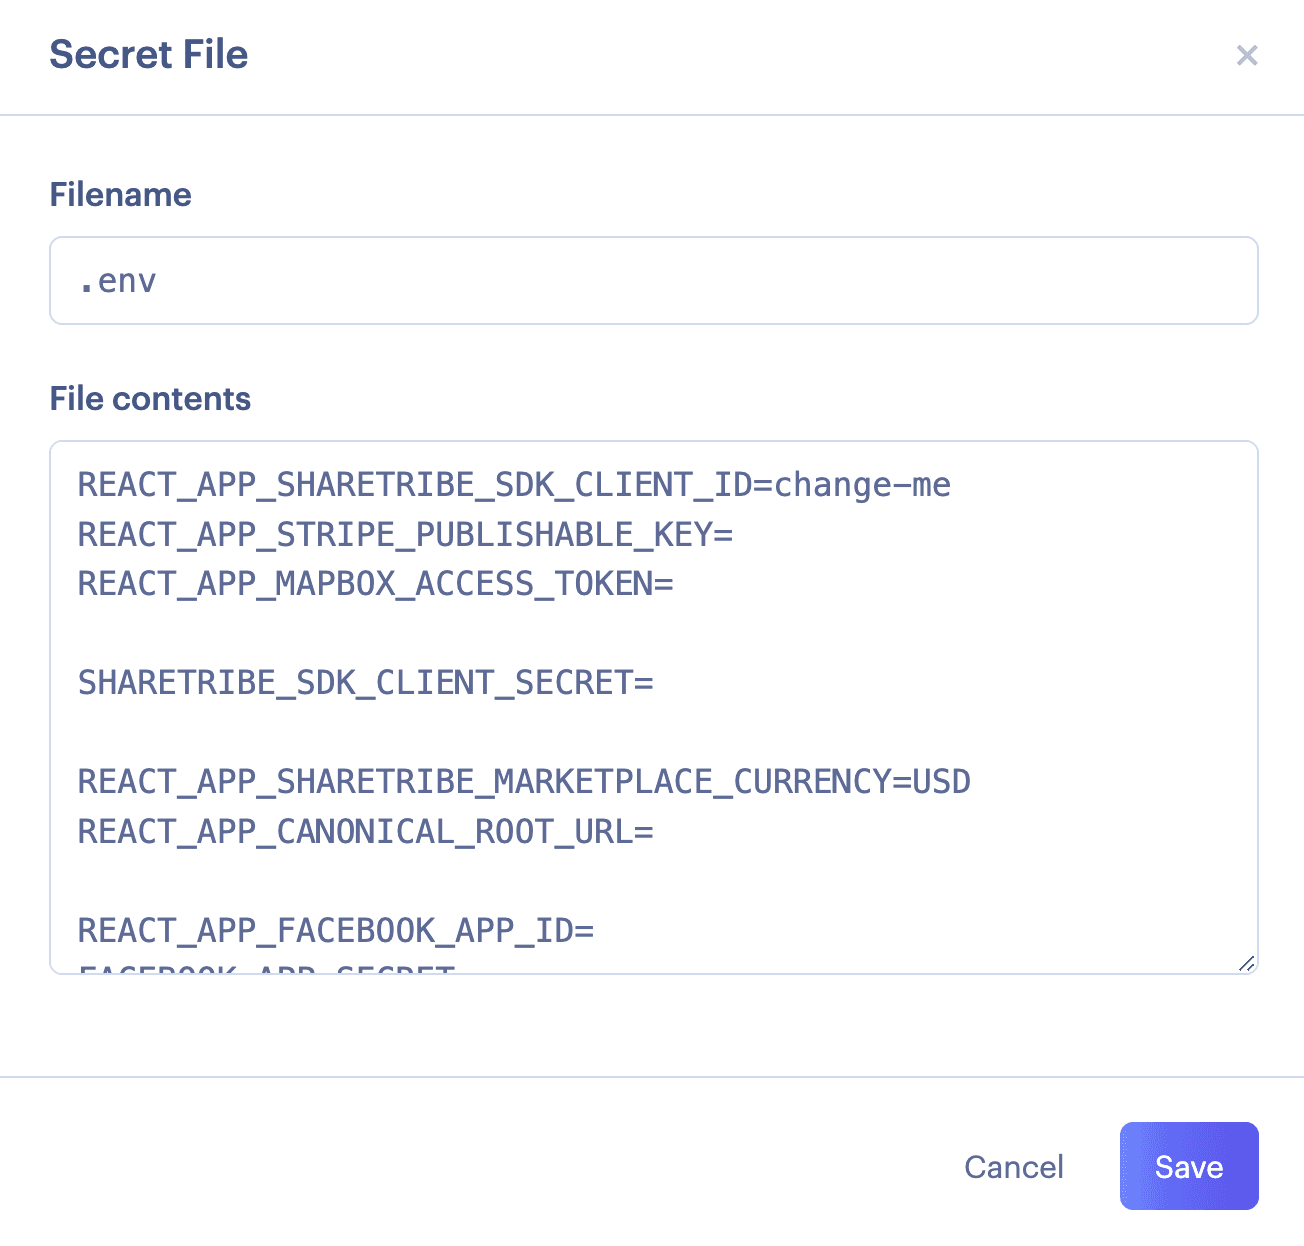
You then need to add the following environment variables:
-
REACT_APP_SHARETRIBE_SDK_CLIENT_IDSharetribe client ID. Check this from Console.
Information
For a dev staging app meant for developing further features, use a client ID and secret from your Dev environment.
For a test staging app meant to act as a custom-developed preview app for your no-code changes in the Test environment, use a client ID and secret from your Test environment. Note that you need to enable Hosting mode in your Test environment before you can connect it to your client application.
-
SHARETRIBE_SDK_CLIENT_SECRETSharetribe client secret. Check this from Console.
-
REACT_APP_STRIPE_PUBLISHABLE_KEYStripe publishable API key for generating tokens with Stripe API. Use the test key (prefix
pk_test) for development. -
REACT_APP_MAPBOX_ACCESS_TOKENIf you are using Mapbox instead of Google Maps
-
REACT_APP_SHARETRIBE_MARKETPLACE_CURRENCYThe currency used in the Marketplace is formatted in the ISO 4217 currency code. For example USD, EUR, CAD, AUD, etc.
-
REACT_APP_MARKETPLACE_ROOT_URLThis is the root URL of the marketplace. Remove trailing slash from the domain.
E.g.https://<the-name-of-your-app>.onrender.com -
REACT_APP_MARKETPLACE_NAMEMarketplace name in self-hosted marketplaces is set through environment variables. If not set, this defaults to 'Biketribe' in src/config/configDefault.js.
-
NODE_ENVDefines whether the application is run in production or development mode. Use 'development' for development and 'production' for production.
Use value: 'production' -
REACT_APP_ENVA more fine-grained env definition than
NODE_ENV. For example, this sends environment info to the logging service Sentry. (If you have enabled it withREACT_APP_SENTRY_DSN).
For this setup, use value: 'production' if you are using HTTP basic access authentication, and value 'development' otherwise – using 'development' here disables the HTTP basic access authentication. -
REACT_APP_SHARETRIBE_USING_SSLWhen using Render, this value should be set to false.
Redirect HTTP to HTTPS?
Use value: false -
SERVER_SHARETRIBE_TRUST_PROXYSet this when running the app behind a reverse proxy, e.g. in Heroku.
Use value: true -
REACT_APP_CSPContent Security Policy (CSP). Read more from this article.
Accepts values: block and report. The recommended value is block. -
REACT_APP_AVAILABILITY_ENABLEDPossible values: true/false
Use value: true -
REACT_APP_DEFAULT_SEARCHES_ENABLEDPossible values: true/false
Use value: true
If you change these values later on, you need to redeploy the app. Environment variables are baked into the static build files of the web app, so a new build is required.
Create web service
Once you are ready, click on the "create web service" button and wait for your build to be deployed. Once the build is complete, you will be able to access your marketplace through the URL displayed in the Render dashboard.
Domains and certificates
Render manages TLS certificates automatically for new applications. You can enable a custom domain through the Settings tab. Read more through Render's documentation.
What next?
Now that your marketplace is running in a staging environment, you should test the app thoroughly using both desktop and mobile layouts. In addition, you should try to:
- Create new users
- Create new listings
- Book listings
- Test social sharing
- Save payment card
- Use test card numbers.
In the next part of this tutorial, we'll go through how to add new tabs to the listing wizard.