Deploy to Heroku
This guide provides a practical demonstration of how to deploy the Sharetribe Web Template to Heroku. Heroku is one of the most popular cloud hosting service providers, and because of that, there is a lot of information online that can help you solve and debug potential problems with your deployment. Unlike Render , Heroku does not provide a free tier.
Before deploying your marketplace to Heroku, you need to create three accounts:
Deploying the template to Heroku
Create a Heroku account
Go to Heroku and create a new account if you do not have one.
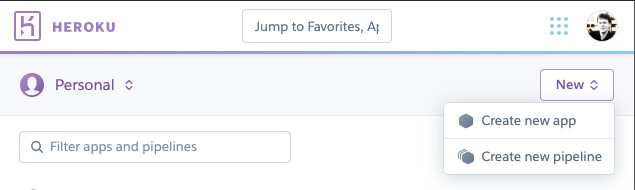
Create a new app
Create a new app in the Heroku dashboard.
Change the environment variables
In Heroku, you can configure environment variables from the Heroku dashboard .
Go to the Settings page of your new app and reveal Config Vars:

Then add the following environment variables as Config Vars:
-
REACT_APP_SHARETRIBE_SDK_CLIENT_IDSharetribe client ID. Check this from Console .
-
SHARETRIBE_SDK_CLIENT_SECRETSharetribe client secret. Check this from Console .
-
REACT_APP_STRIPE_PUBLISHABLE_KEYStripe publishable API key for generating tokens with Stripe API. Use the test key (prefix
pk_test) for development. -
REACT_APP_MAPBOX_ACCESS_TOKENIf you are using Mapbox instead of Google Maps
-
REACT_APP_MARKETPLACE_ROOT_URLCanonical root URL of the marketplace. Remove trailing slash from the domain.
E.g.https://<the-name-of-your-app>.herokuapp.com -
REACT_APP_MARKETPLACE_NAMEMarketplace name in self-hosted marketplaces is set through environment variables. If not set, this defaults to ‘Biketribe’, or whatever value you have set in src/config/configDefault.js. -
NODE_ENVDefines whether the application is run in production or development mode. Use ‘development’ for development and ‘production’ for production.
Use value: ‘production’ -
REACT_APP_ENVA more fine-grained env definition than
NODE_ENV. For example, this sends environment info to the logging service Sentry. (If you have enabled it withREACT_APP_SENTRY_DSN).
For this setup, use value: ‘development’ -
REACT_APP_SHARETRIBE_USING_SSLRedirect HTTP to HTTPS?
Use value: true -
SERVER_SHARETRIBE_TRUST_PROXYSet this when running the app behind a reverse proxy, e.g. in Heroku.
Use value: true -
REACT_APP_CSPContent Security Policy (CSP). Read more from this article.
Accepts values: block and report. The recommended value is block.
If you change these values later on, you need to deploy the app again. Environment variables are baked into the static build files of the web app - so a new build is required.
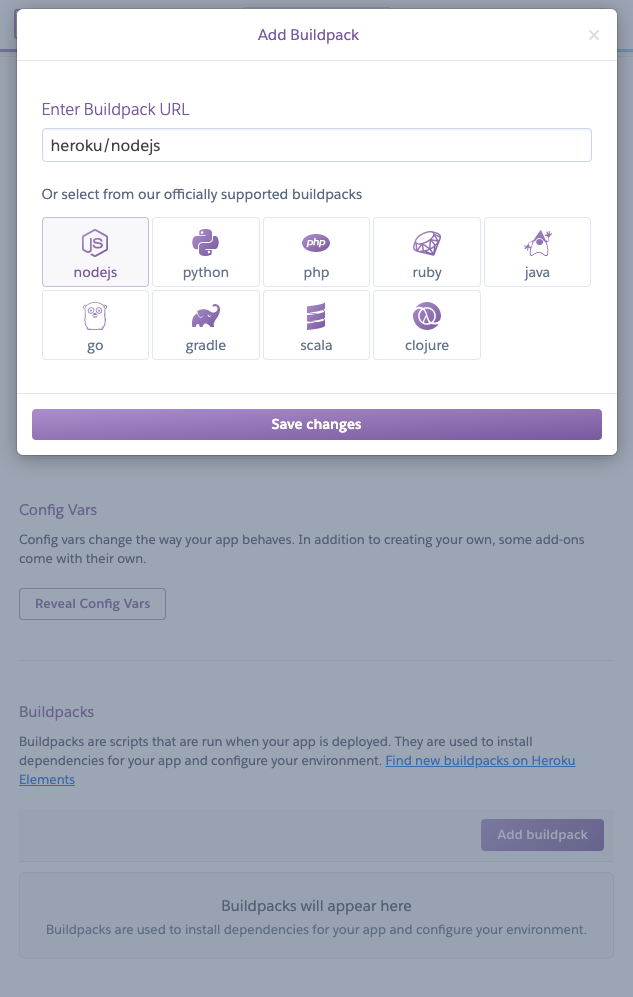
Add a Node.js buildpack
Go to the Settings page of your new app and add the official buildpack: heroku/nodejs
Connect the Heroku app to Github
Go to the Deploy page of your new app and connect the app with Github .
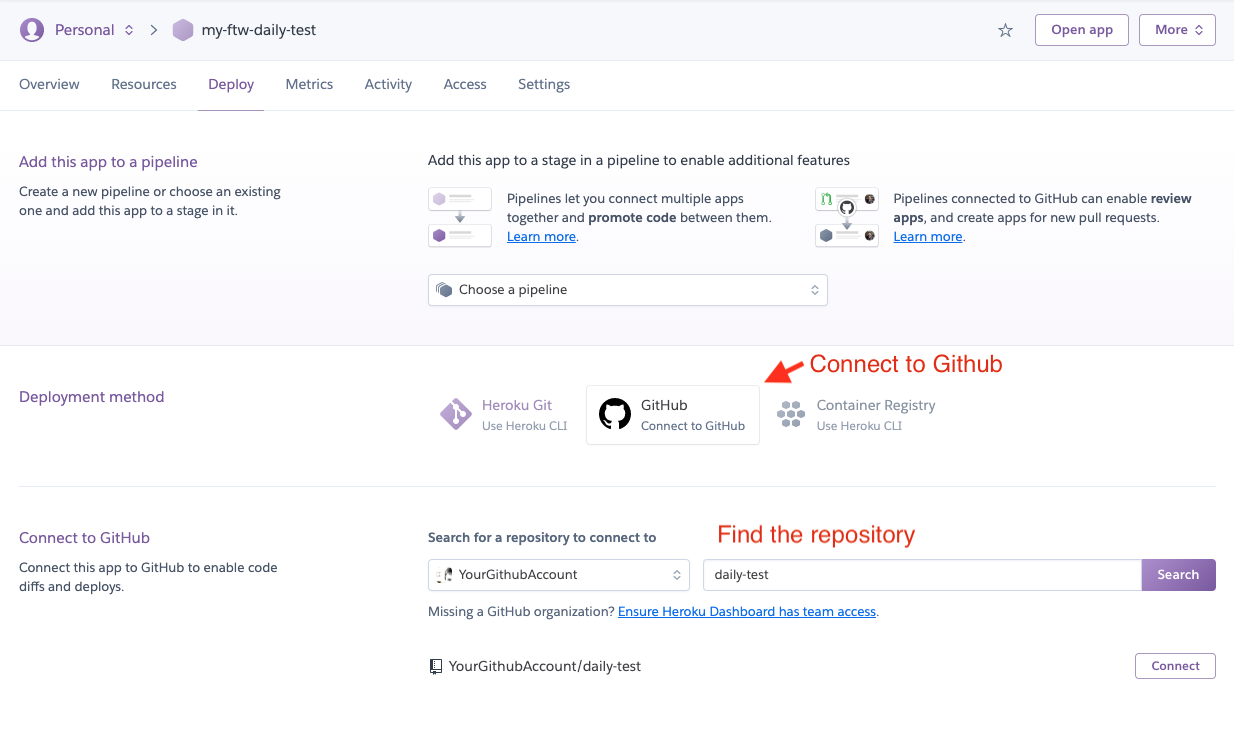
After that, you can deploy the app manually or enable automatic deploy from your default branch (usually named as main or master).
If everything works, your app should be available in a URL that looks a
bit like this: HTTPS://<your-app-name>.herokuapp.com
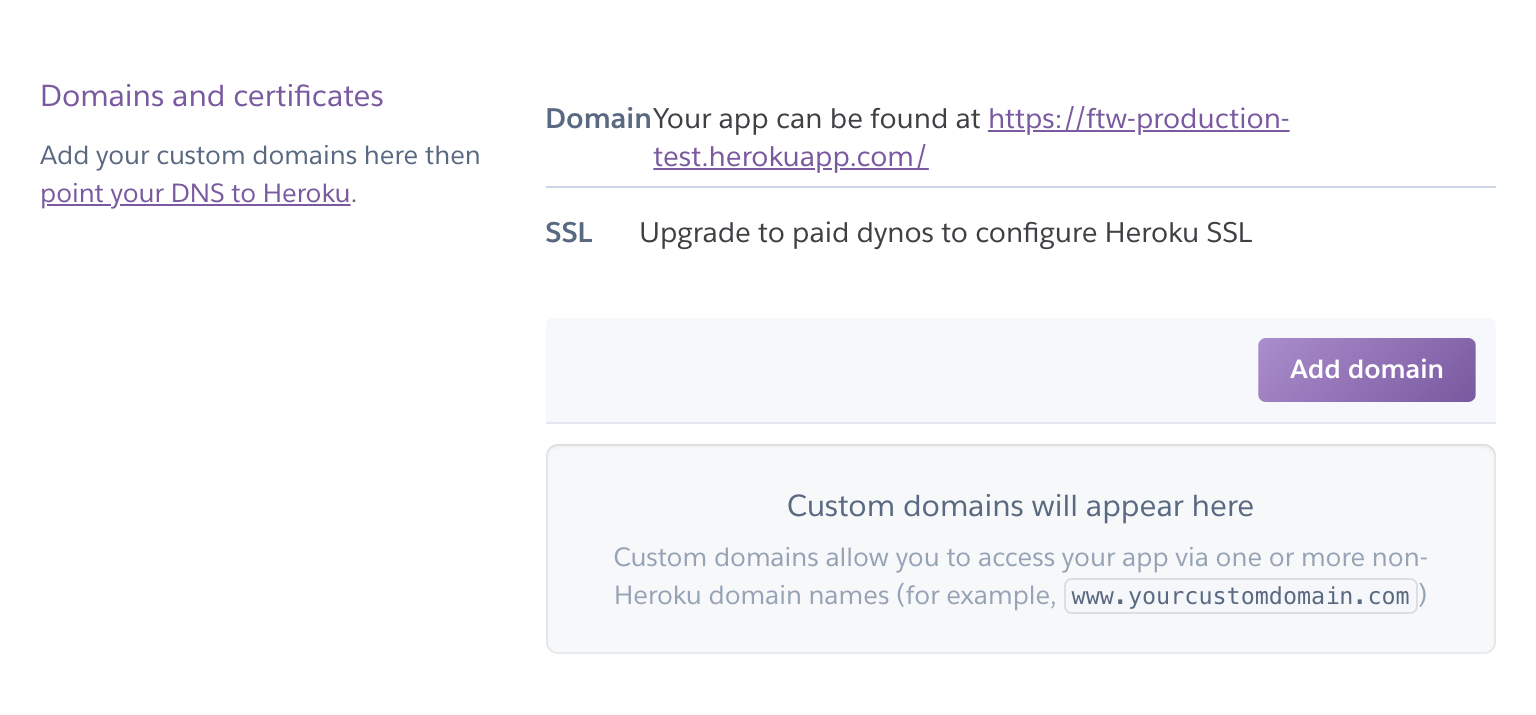
Set up domains and certificates
Heroku manages SSL certificates automatically for new applications. You can change your domain and SSH settings in the Settings tab.
Read more from Heroku docs:
Heroku logs
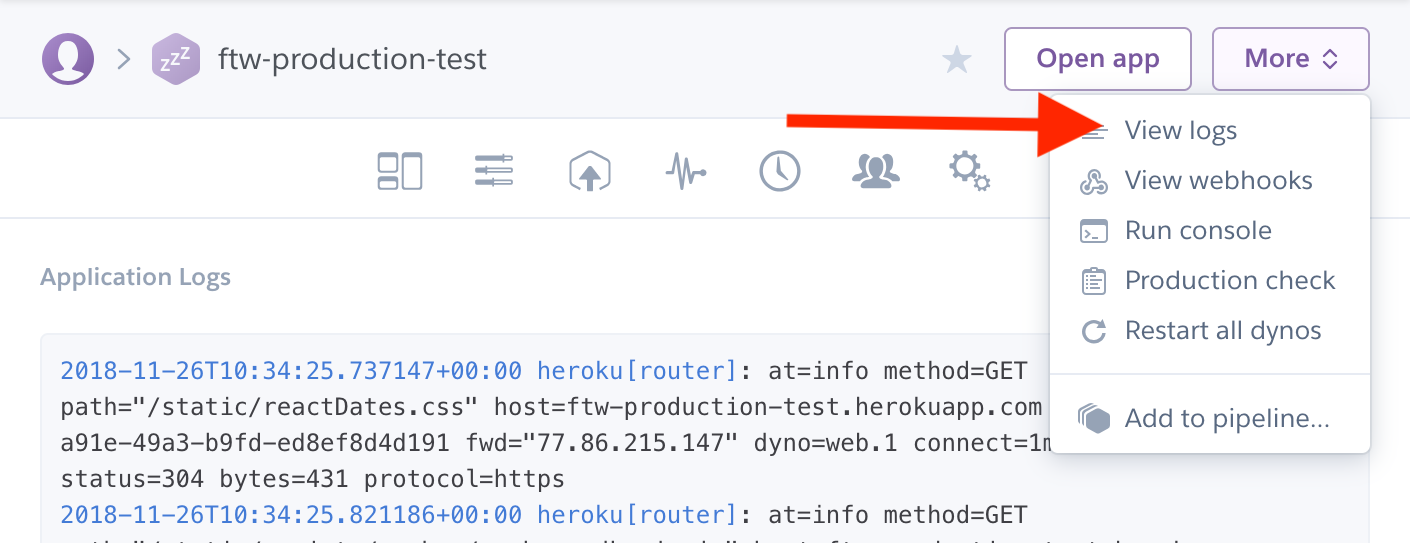
You can find your application’s logs by clicking button “More” in the upper right corner and selecting “View logs” from the opening dropdown. Logs can be useful if there are problems when deploying the app.
Troubleshooting Heroku
By default, Heroku will use latest Long-Term-Support (LTS) version of
Node.js. So, you might want to specify that your dev and production
environments use the same Node version as your local machine when you
run yarn run dev-server.
This can be done by adding an engines section to the package.json.
Read more from Heroku’s
Node.js Support guide .
You should also check that the environment variables in your local environment matches with Config Vars in Heroku app settings.